Why film your ride? Studies have found that professional cyclists have a superior pedaling technique to elite cyclists. This is perhaps no surprise, given the level of training and dedication required at a professional level. But in order to improve speed and reduce the risk of injury, leisure cyclists can learn from the pros. By studying your own practice, you can improve your technique without investing in formal training. One of the best ways to do this, particularly if your focus is speed, is to film your ride.

How to film your ride – what kind of camera will you need?
To film footage of your cycling that’s clear enough for you to learn from, you’ll need an action camera. While the tech is similar, unlike a regular camera, an action camera has a wider lens and comes with accessories that allow you to attach it to your helmet, clothing or handlebars. Make sure your camera is HD, which will allow you to play your footage on your computer, TV or smartphone with good quality video playback. For the clearest images, 4K is advisable, as this will allow you to clearly see every mistake and misdirected movement in your ride.
Action cameras do record sound, which won’t be necessary when you’re using yours to monitor your cycling technique. However, if you’re also going to use it to record cycling trips and share videos with friends and families, it’s worth noting that outdoor filming requires different sound recording techniques: a lavalier microphone would be your best bet for a cycling trip, as this will pick up less ambient noise than other mics, and you’ll be able to clip it to your clothing to remain completely hands-free in your recording.
How to secure the camera
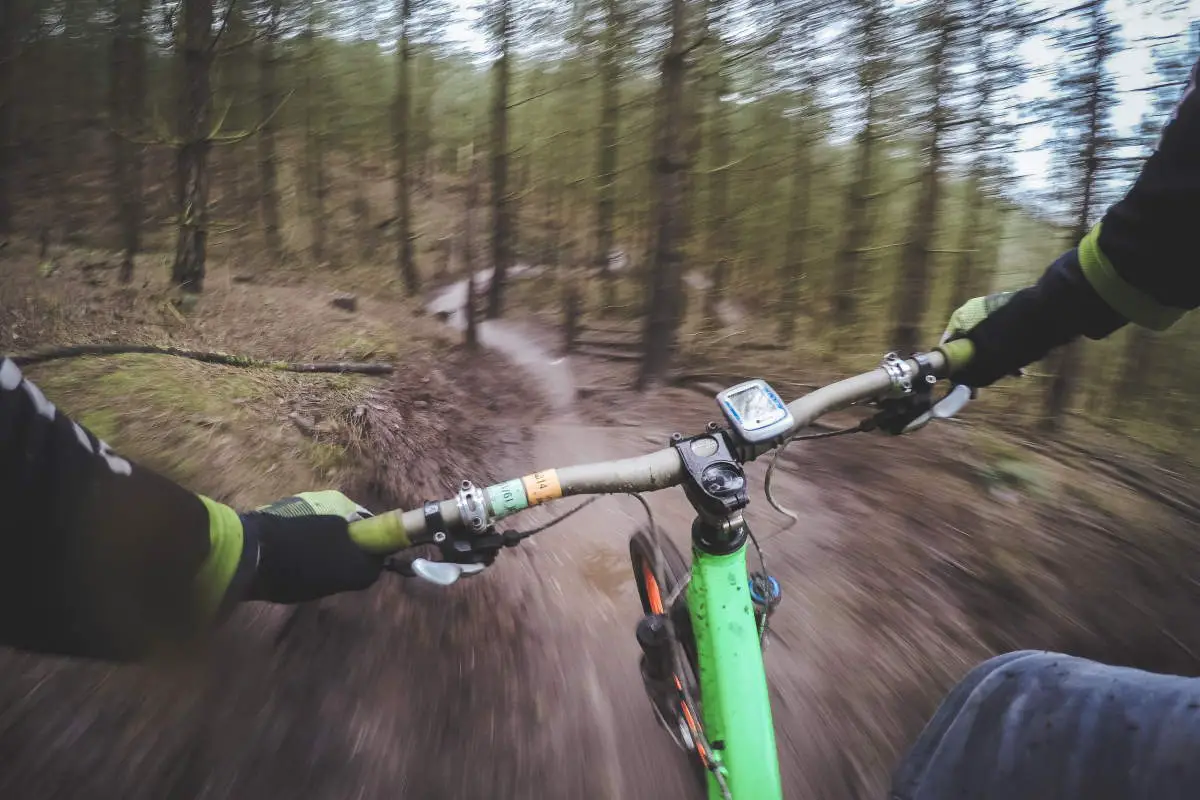
Your action camera will come with a variety of accessories, which means you can experiment with the placement you find most useful. For the smoothest footage, use the chest mount and set the camera to film your handlebars, arms, and the road ahead. This will allow you to view your weight placements and movements clearly. Make sure the straps are tight to avoid vibrations affecting the footage. A similar effect can be achieved by mounting the camera on your helmet, but be careful of the angle: if you aim it too low, you won’t catch your arms on the handlebars, but instead, just capture the floor.
You’ll also be able to mount the camera on the bike itself, which will allow you to film parts of your body that mounting it elsewhere won’t allow for. However, vibrations from the bike can make the footage unusable, so this may not be the best technique to learn from. If you want to film your pedaling technique specifically, it would be best to buddy up with another cyclist, who can film you in action from an outside perspective.
What you can learn
By attaching an action camera to your helmet or chest when you’re riding, you’ll be able to see mistakes in body weighting and turns. If you’re climbing peaks wrongly or approaching turns too low, your footage should allow you to see this and learn from your mistakes. You can also compare your footage to films of professional riders: what are they doing differently to you, and how can you hone your technique to emulate them? If you’re able to improve your technique, your speed should also improve.
By harnessing the power of technology, you can spot mistakes in your technique and improve your performance and speed without paying for professional skills training. However, if you really want to see improvements, professional coaching in tandem with your own monitoring will bring you the best results.
- A Guide To Watching The Tour de France 2024 in Person - April 11, 2024
- For Cyclists, Rest Days Are Essential To Avoiding Long-Term Injury - June 27, 2023
- Why Cyclists Need Complex Carbohydrates For Enhanced Endurance - February 12, 2022